Sunday, May 17, 2020

Giving blogging another go


After being reminded that this blog exists after a previous post that I had post-dated years in the future posted, I thought I give blogging another go.

A few months ago, I picked up an Arduino kit since I needed an Arduino microcontroller as a bootloader in order to upgrade the firmware on my 3d printer.  Anyways, during the COVID-19 lockdown, looked at my Arduino kit, and thought to myself that I could use the ultrasonic distance sensor and integrate that into an electronic sentry for a future game...

So I took out the Arduino and created a simple circuit with an HC-SR04 ultrasonic sensor and an   RGB LED light for output, and adapted the code from Sparkfun such that a measured distance of less than 20cm would light up the LED as red, more than 20cm but less than 40cm as yellow, and more than 40cm as green.
So the Light Tank, M3 that I had hanging around after 3d printing successfully tripped the sensor at 15cm.


The Light Tank, M3 reliably tripped the sensor when full on, and broadside aspect, but did so unreliably when angled 45 degrees to the sensor.

Success


Next, I tried with a kneeling GI with M1 Carbine (I believe that the model is Old Glory 28).   At first it looked like I had success since the light was green... but as soon as I removed my hand, it was for naught and the light went green.

The green light of failure.
 Nonetheless, I think this is a valid proof of concept for a sentry in a pillbox for a raid scenario.  Net step will be adapting a pillbox from thingivers to handle the wiring, or failing that, sketch one out on tinkercad.   It's slightly disapointing that a single 28mm model won't reliably trip the sensor, the fact that 28mm models don't move by themselves and need a hand to move is sufficient by itself to make a useful gaming peice.  

As for why use an Arduino and an ultrasonic sensor when a measuring tape will give the same information?  1) It's possible,  2) it looks cool, and 3) I think this makes the tabletop game more immersive for the player.

 Hopefully the next blogpost won't be written multiple years and a degree ago.

Friday, April 24, 2020

French Loose at Naval Thunder... Again

After having found  an old draft a previous naval game on my blog, I finished it up and posted the game on our gaming group's Facebook page.  Seeing the post, Stu asked when we were running our next naval game.  As it turns out, it was this weekend.


John and Stu measure the distance between


Derrik ponders on the British fleet.  From left to right, Robby's squadron, Derrek's squadron and Stu's squadron.
John Plotting his ship movements


Stu happily clutches the SSD of the French Battleship Richelieu after inflicting a magazine explosion on the Red Eminence.  Robby is less than impressed in the background. 


Stu holds up the SSDs of Richelieu and Strasbourg after having sunk the ships.


Andy claims the only French victory of the day - the battleship Alsace sinking the heavy cruiser HMS London.  Andy's glee is a function of scoring a kill as well as seeing the French get royally clobbered.


Tuesday, July 1, 2014

France's New Toys and a Fight Against the Brits

My new ships from Shapeways.  The set in the bag contains the Clemenceau and the Gasgogne.


BBCV Jean Bart ready for spray painting and the front end of the Alsace peaking in the picture.

French on the near side, Perfidious Albion on the far side

Stu plotting


Stu rolls his critical hit on the Hood...

And the Hood's magazine is hit.
I just realized that I forgot about this post and most of the details of the battle escape me at the moment.  From what I can remember, the lack of radar hurt the French and that by the end of the day Davy Jones' had a formidable supply of baguettes.  Conversely the only capital ship that the Brits lost was the Hood, but that's to be expected from a ship of that pedigree.

Saturday, February 16, 2013

Fear God and Dread Nought: Jutland in 1/6000 with Naval Thunder

So last Sunday I had to go to the police station.  No, not for anything criminal, but to join the Historical Gaming Association of London in their monthly game ;-)

So for this month's game, it was decided that I would be hosting a re-fight of the battle of Jutland using my 1/6000 scale Figurehead ships and the Naval Thunder Clash of Dreadnought rules. This battle is one of those that gamers always want to play to a conclusion, but almost never do due to running out of time and space. I hoped that with the smaller figures and this set of rules would help make this dream a reality.  We'll see how this ends...

Victory Conditions:

  • British Grand Fleet:  
    • Tactical Victory: Sink more capital ships than lost
    • Strategic Victory: End the battle with more capital ships than the Germans. 
  • German High Seas Fleet
    • Tactical Victory: Sink more capital ships than lost
    • Operational Victory: Sink more than 2x the number of ships than lost
    • Strategic Victory:  End the battle with a number of ships equal to or more than the number of British ships


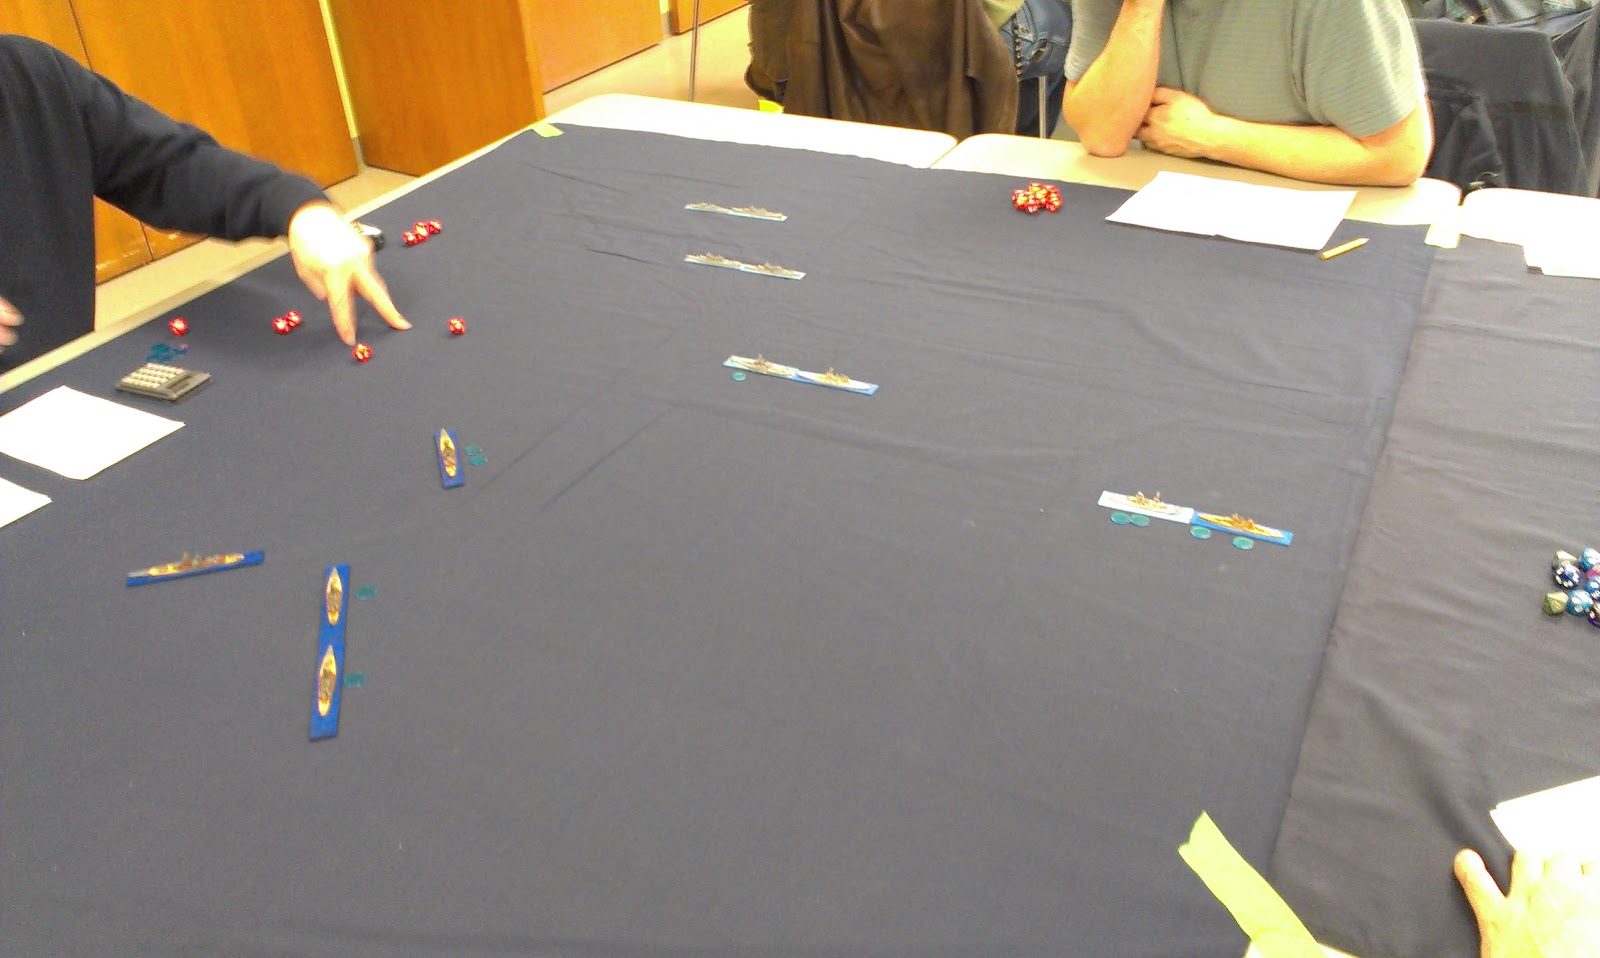
Jim measuring the movement of the Iron Duke.
The Brits from Left to Right: Bob, Gavin, Jim, Greg and Stephen (off frame)

The Grand Fleet's OOB
  •  C-in-C of the Grand Fleet, Admiral Sir John Jellicoe (Jim)
    • Second Battle Squadron, Vice-Admiral Cromarty (Gavin)
      • First Division
        • HMS King George V
        • HMS Ajax
        • HMS Centurion
        • HMS Erin
      • Second Division
        • HMS Orion
        • HMS Monarch
        • HMS Thunderer
        • HMS Conqueror
    • Fourth Battle Squadron, Vice-Admiral Sir Sturdee (Jim)
      • Third Division
        • HMS Iron Duke
        • HMS Royal Oak
        • HMS Superb
        • HMS Canada
      • Fourth Division
        • Benbow
        • Bellerophon
        • Temeraire
        • Vanguard
    • First Battle Squadron, Vice-Admiral Burney, (Greg)
      • Fifth Division
        • HMS Colossus
        • HMS Collingwood
        • HMS St. Vincent
        • HMS Neptune
      • Sixth Division
        • HMS Marlborough
        • HMS Revenge
        • HMS Hercules
        • HMS Agincourt
    • Third Battlecruiser Squadron, Rear-Admiral Hood (Stephen)
      • HMS Invincible
      • HMS Inflexible
      • HMS Indomitable
  • Battlecruiser Fleet, Vice-Admiral Beatty (Bob)
    • First Battlecruiser Squadron
      • HMS Lion
      • HMS Princess Royal
      • HMS Queen Mary
      • HMS Tiger
    • Second Battlecruiser Squadron
      • HMS New Zealand
      • HMS Indefatigable
      • HMAS Australia*
    • Fifth Battle Squadron
      • HMS Barham
      • HMS Valiant
      • HMS Warspite
      • HMS Malaya 
* HMAS Australia was not present at the battle, and I "blew her up" with a "torpedo" at the start of the battle in order to give the British periscopeitis.
.
Stu gesticulating his strategy to the other German Admirals.  In short: "Come and save me!" 
The German side: (From Left to Right) Stu, Hayden, Rich and Glenn

So for the German OOB we have:
  • C-in-C of the High Seas Fleet, Vizeadmiral Scheer (Rich)
    • Third Squadron
      •  5th Division
        • SMS König
        • SMS Grosser Kurfurst
        • SMS Kronpriz
        • SMS Markgraf
      • 6th Division
        • SMS Friedrich der Grosse
        • SMS Kaiser
        • SMS Prinzregent Luitpold
        • SMS Kaiserin
    • First Squadron, Konteradmiral Schmidt (Hayden)
      • 1st Division
        • SMS Ostfriesland
        • SMS Thuringen
        • SMS Helgoland
        • SMS Oldenburg
      • 2nd Division
        • SMS Posen
        • SMS Rheinland
        • SMS Nassau
        • SMS Westfalen
    • Second Squadron, Konteradmiral Mauve, (Glenn)
      • 3rd Division
        • SMS Deutschland
        • SMS Hessen
        • SMS Pommern
      • 4th Division
        • SMS Hannover
        • SMS Schlesien
        • SMS Schleswig-Holstein
    • First Reconnaissance Group, Vizeadmiral Hipper (Stu)
      • SMS Lutzow
      • SMS Derfflinger
      • SMS Seydlitz
      • SMS Moltke
      • SMS Von der Tann

When I set up the table, I tried simulate the historical battle by getting the scouting fleets to go at it first and then have the main fleets rush in for the general action (more on how this affected the battle later at then end).  And so whilst the main fleets of dreadnoughts and super-dreadnoughts are steaming at full speed towards the sound of the guns, the two scouting fleets start the action at medium/long range.  On the first turn, Stu turns his Battlecruisers broadside-on while Bob in a true Nelsonesque/Beattyesque fashion charges full steam ahead towards the enemy.  As the main guns open up Krupp armour, luck and bad British shell design seem to greatly favour the Kaiserliche Marine as only the Moltke takes takes one non-penetrating hit and all other non-penetrating hits are downgraded to non-hits.  On the other hand, the New Zealand's suffered simultaneous multiple floodings, fires and an engine hit.  The Tiger was also targeted and suffered only one fire and a flooding.  


Bob turns his splendid cats and the lessor battlecruisers to engage broadsides with Stu.
Realizing that a Nelsonian engagement at pistol range would be suicidal, Bob decides to turn his battlecruiser squadrons to engage broadside to broadside whilst his Queen Es continue ahead in order to force a crossing of Stu's T.  During the shooting phase, Bob is again hurt by the bad luck and bad British shells as his meagre number of hits rarely penetrates the thicker armour, and most of the ones that do penetrate are downgraded to non-penetrating status because of odd-numbered die rolls. Once again, the Germans are able to hit and consistently penetrate the less well armoured British battlecruisers.  The ability to consistently penetrate the enemy shows in the state of the ships, as the whilst the Brits are consistently trying to put out fires and plug the holes below their waterline, the German ships suffered mostly cosmetic damage and all were above 80% health. During the secondaries phase, things got ... messy ... for the British as an 15cm shell from the Lutzow pasted Vice-Admiral Beatty all over his command bridge on HMS Lion via a super-structure critical.  I guess that the British were will affected by the sudden loss of Vice-Admiral Beatty because only one of their 8 torpedoes hit the the Lutzow whereas 3 of the four German torpedoes his the battlecruisers, causing a jammed rudder on HMS Lion.

During the next turn, we do see that the Grand Fleet's manoeuvring woes continue, as the majority of the battlecuisers are badly hit and suffering from a mixture of bridge and rudder hits.  These woes are further exacerbated by Stu crossing the T on the Queen Elizabeths and being relatively immune from return fire due to the multitude of shell splashes from the lead ships of Jellico's force at extreme range. 


Hipper's squadron is targeted by many different British ships.  However, this had the side effect of destroying British accuracy.
At this point of the game, Bob (as Admiral Beatty) is getting frustrated by his inability to get critical hits on his opposite number.  In a dash of suicidal brilliance, he realities that there is no rule for bad British Torpedoes, and thus positions his ships accordingly.  Stu obliges Bob and to Bob's chagrin opens up his undamaged torpedo broadside on the Queen Elizabeth.  Things are getting more and more dire for the British Battlecruiser Command.  The Bridge hits on HMS Queen Mary forces it to move ahead by 5 inches, and normally this would be fine... except that HMS Tiger had an engine hit that slowed it down to 3 inches per turn...  Once again, Bob's dice betray him and the two battlecruisers collide and leaves the Tiger on fire with only one hull point left.  The two indefatigable class ships are also in dire straights with HMS New Zealand sporting a list, multiple fires and multiple flooding as well as HMS Indefatigable suffering from a low number of hull points, a fire and multiple instances of flooding. 
Hipper opening up on a his undamaged broadside on the Queen Elizabeths.  In the foreground, HMS Queen Mary rams HMS Lion and effectively hands out a death sentence for the Battlecruiser.   
As the Queen Elizabeths close to point blank range (3"), they open fire with their 15 inch naval guns anticipating massive damage on the upstart battlecruisers.  Once again, the dice betray Bob (notice a theme here) and he rolls an unlikely amount of uneven numbers, and thus turning a potentially devastating barrage into a work order for a new coat of paint.  During the secondaries round, both sides rolls a bucket of dice apiece hoping for super-structure criticals, and once again, Stu is lucky knocking out the bridges on HMS Barham and HMS Warspite whilst only suffering from a few fires in return.  (It should be noted that both Stu and Bob were using the same dice)

Closeup on the torpedo runs.  Short range damage from the Queen Elizabeths are a disapointment since many of the 15inch shells shatter on the outside of the Battlecruiser's hulls.
The torpedo runs were particularly vicious with all ships involved suffering at least a hit, but once again, the Germans got off less injured than the British.  Meanhile in the rest of the battle, the German pre-dreadnought engage HMS New Zeland, and promptly miss all their shots. 


At this point, we decided to call the game since we were running out of time (we only had from 10am to 3pm and took a half hour lunch at noon).  

It was decided that the Indifatigables, HMS Queen Mary and HMS Tiger were goners in the next turn ether though gunfire or a combination of fire-fighting/flooding.   It was also decided that since HMS Lion and HMS Princess Royal were slowed down, on fire and flooding, not to mention in range of the Koning class ships, they would have a limited life expectancy of just a few turns.  Furthermore, HMS Barham was down below quarter of it's original hull points and all other Queen Elizabeths were at least below half of their starting hull points, that if they could break contact they would need extensive dry-dock time to return to fighting shape. 

On the other side of the ledger, SMS Lutzow was the only German battlecruiser to be below half hull points, and SMS Derfflinger was the only German battlecruiser to be slowed down from their original top speed. Since Hipper would have to extricate his squadron from point blank engagement with the Queen Elizabths and still deal with the crippled British battlecruisers on his way out, it was felt that baring a golden BB hit, Hipper would most likely lose the Lutzow and the Derfflinger or at the very least force them into a very long stay in the dockyards. 
The final position from the German's point of view.
So how does this tally-up in light of the goals?  Without a doubt, this battle is a major tactical victory for the Germans.  At every turn, they outmanoeuvred the British and were able to inflict disproportionate damage on their adversaries.  As for the global strategic outcome, I am of two minds of this.  On the one hand, it could be argued that the British did not lose the status quo in controlling the sea for they still had more capital ships in the North Sea at the end of the battle than the Germans, and thus by maintaining a fleet in being, they could continue the blockade and continues to choke off imports crucial for the Imperial German warmachine. 

On the other hand, losses on this scale would have shaken the British people to their core. It we were to look at the political fallout of Jutland with the relatively small number of ships lost compared to this battle, it is very possible that Admiral Jellico is sacked outright and probably court-marshalled "pour encourager les autres".  Also it is quite possible that this could have lead to H.H. Asquith's government from falling in June rather than December.
Final Position from the British point of view.  Jellico orders all of his battleships to turn to Starboard and break contact in order to preserve his fleet. 


A few remarks about the set-up and the battle
  • One mistake on my part was setting up the Battleships 3 feet from the battlecruiser action.  This was mostly due to me playing much more Naval Thunder Battle Ship Row lately in which the average speed for a battleship is 7 inches per turn and the extreme ranges for the guns are between 60 and 80 inches instead of 5 inches of movement and 36 inches in range during the WW1 time period.
    • On the other hand, this allowed the battlecruisers to duke it out by themselves for a few turns before getting re-reinforcements from the main battle lines.
  • I'll say it again, but in this game it's crucial to be able to consistently score critical hits in order to score serious damage on the enemy. 
    • As a consequence of this, the Bad British Shell rule really hurt the British's ability to cripple the Germans in a timely fashion. 
  • We also played with the Powder flash rules, and in this respect Bob's dice were excellent and saved three ships from turning into rapidly expanding balls of smoke.
  • Despite all of the critical hits that were rolled on the critical hit table, no ships rolled a twenty and thus spontaneously blew up.  I was surprised and pleased.  I hope that this could be offered as proof that this game is not ruled by golden BBs.
  • As to the participants of the battle, I'm sorry for taking this long, but the flue and real life got in the way.

Tuesday, January 29, 2013

Mers-el-Kébir with the French at Sea

So on Saturday we had a short playing session at the library due to other conflicting obligations.   So since we had just a bit of time, we decided to play a twist on the British sinking the French fleet at Mers-el-Kébir.  In order to speed up the scenario, we ignored the British aircraft carrier as well as all of the destroyers on both sides.  This left the players with:

  • British (Rear Admiral Marty)
    • Battleship Squadron
      • HMS Hood (Admiral Class)
      • HMS Valiant (Queen Elizabeth Class)
      • HMS Resolution (Revenge Class)
    • Light Squadron
      • HMS Arethusa (Arethusa Class)
      • HMS Enterprise (Emerald Class)
  • French (Contre-amiral Kevin)
    • Modern Division (Dunkerque Class)
      • Dunkerque
      • Strasbourg
    • Old Division (Bretagne Class)
      • Bretagne
      • Provence
Kevin chose the French since he thought that he could redeem his performance from last week in which he lost two battleships and two battlecruisers in exchange for a North Carolina class.  Once again, we chose to use the L shaped table configuration because the extreme range of the Dunkerque's guns is 80 inches and we felt that this would permit some pre-contact manoeuvring. 

British Deployment with HMS Arethusa leading HMS Enterprise on the right and HMS Valiant leading HMS Resolution and HMS Hood.


Strasbourg leading Dunkerque on the far side and Bretagne leading Provence on the near side.

Kevin looking over his SSDs in order to maximize the effectiveness of his task force.

 
As the ships approach contact, the British light cruisers lay down a smoke screen in order to help protect the outnumbered battleships.

Kevin finds the smoke to be vexing, and measures the range to the light cruisers.
The French are out-ranging the Brits by a substantial margin (80" to 60").  Therefore the British light cruisers create a smoke screen in order to protect the more valuable capital ships.  These actions proptly made the cruisers a target in the eyes of the French and many poorly paraphrased lines from Scotty were uttered every time the HMS Enterprise was hit.
Kevin is turning his battlecruisers to face Albion's battleships, accepting that at this range it would be better to be a harder target to hit and suffer the armour penalty if hit.

As the Brits fire off their first salvo, one hit is recorded, and the result was a main battery hit on the Strasbourg.  Since the French turrets had a 60mm steel partition between the two half of the turret, we decided to give the French player a 6+ save to see if he would loose the entire turret of 4 guns or just half the turret, leaving it 2 guns.  In this case, Kevin failed the save, and the whole turret was lost...or so we thought.  It was pointed out that the British hit should not have counted since the British player forgot to add the +1 for crossing the T.  With this new modifier, the roll to hit failed, and the Strasbourg's turret reappears as if by magic.


The smoke screen from the light combatants.


Kevin sinks the two light cruisers... The smoke lingers on

In the next turn the French succeed in sinking the British light cruisers and the British score a main battery destroyed on the Dunkerque. 

The French fleet as night falls.

The Final position, and the peanut gallery looks on.


So we had to call this game earlier that usual.  In the final tally the French only had minor structural damage on the Dunkerque and the British lost both light cruisers.  So we called it as minor French victory.

Sunday, January 13, 2013

The Battle to Determine the name of Chips: French Fries or Freedom Fries

It looks like so far my blog is only posting the games in which John is absent.  This is not my intention, but it looks like that because it's been a while since I've played at the HRGG when John is there.  Regardless, today John had a great reason for not gaming... picking up his wife from the hospital. (Good luck on your recovery Beth.)


So today we decided to break out my new WW2 French fleet and since we didn't have any Italians ships any of our collections or any painted Brits (I'm working on them, but they aren't fully painted yet), we decided to get a little tong-in-cheek and picked the Americans - hence the title of the post. 

Kevin surveys the American fleet from the French table corner


  •  French Order of battle
    • Task-force Baguette (Vice-amiral Kevin)
      • Battleship Division (All Richelieu Class)
        • BB-15 Richelieu
        • BB-16 Jean Bart
      • Battlecruiser Division (All Dunkerque Class)
        • BB-13 Dunkerque
        • BB-14 Strasbourg
    • Task-force Brie (Contre-amiral Martin)
      • Museum Division (All Bretagne Class)
        • BB-5 Bretagne
        • BB-6 Provence
        • BB-7 Lorraine
      • Cruiser Division
        • CA Algérie
        • CA Colbert (Suffren Class)
        • CA Montcalm (La Galissonnière Class)
  • American Order of battle
    • Task-Force Burger (Rear-Admiral Andy)
      • Battleship Division
        • BB-60 Alabama (South Dakota Class)
        • BB-56 Washington (North Carolina Class)
      • Cruiser Division (All Baltimore Class)
        • CA-72 Pittsburgh
        • CA-69 Boston
    • Task-Force Bagel (Commodore Deric)
      • Battleship Division
        • BB-39 Arizona (Pennsylvania Class)
        • BB-41 Mississippi (New Mexico Class)
      • Cruiser Division
        • CA-68 Baltimore
        • CL-51 Atlanta
French deployment from Left to Right:  Battleship Division, Battlecruiser Division, Museum Division and Cruiser Division
American deployment from top to bottom: Bagel Battleships, Burger Battleships, Burger Cruisers and Bagel Cruisers.

The game started with both fleets ordering full steam ahead.  It becomes obvious in a few turns that the older ships can't keep up with the more modern ships, and this will have disastrous consequences later on.

Kevin mesuring out the 80 inch range of his Battlecruiser's main guns.  Unfortunately he is half an inch short - much to Deric's glee. 


The game starts promisingly for the French scoring multiple extreme range hits against the older American battleships and the Americans unable to respond back due to the shorter range of their guns.

French fleet sailing at full speed.  Note the Bretagne Class ships falling behind.

View from the American ships from the french position.  Battleships are closer and cruisers at the back.  Older battleships are also falling behind.
As the ships close the Mississippi decides to ignore the battleships to her 10 o'clock and decides to pound the cruisers.  Algérie was first to feel the wrath of the Mississippi and was the only cruiser to survive 2 turns. 

The battle lines are closing, and the cruisers are sinking. 
As the ships closed the range,a few things became apparent:  
    1. Radar fire-control has gives the Americans an strong advantage in all but extreme range. 
    2. Kevin's decision to pile on two ships on each lead ship in order to "Sink a ship instead of leaving 2 wounded ships"
    3. The French fast and light rounds and American's stronger armour made the American ships much more survivable than their French counterparts.  
    4. 16 inch guns are brutal, and massively outclass the Richelieu's 15s

The four modern French battleships form lines of battle.  The three WW1 vintage ships are so far back that they are out of frame.
The Richelieu gets pounded by the 16" guns of the Alabama and looses both it's main turrets and all secondary turrets.  In order to save the hull, Kevin orders the ship out of the line.   

The Jean Bart pounds the Alabama into rapidly sinking scrap.  The Arizona and the Mississippi pound on the Dunkirques. 
The older American ships turn their attention to the Dunkirques, and the their armour is insufficient to stop the onslaught of heavy American shells, and they rapidly join the Alabama into a race to the abyssal depths.


The final position of the battle.  By the end of this turn, all modern French battleships are sunk and the French concede to forevermore eating Freedom Fries. 
During the last turn before we called the game, the heavy cruisers delivered the coup-de-grâce the Richelieu with extreme range fire and the floating museum ships finally got into range and scored a few good hits against the Mississippi.  However, since the ships were outclassed in speed, armour and guns they were still facing long odds even if they were unhurt.   The Washington was at just over 80%, the Mississippi was at about 65% and the Arizona was at 45% and missing one turret.


A few remarks.

  • This game could have been closer if the French had played a bit smarter and had not been dazzled by their speed advantage and used the older ships as ablative shielding while using the modern ships to fire at extreme range.
  • Our gaming group prefers surface actions and between my collection and Andy's there are 0 aircraft carriers.  However this does lead to some unbalancing in points since the heavier AA complement of the American ships inflate their value in an environment with no air or subs.  
 Anyways, I'm off to eat some Fren...Freedom Fries.